 In this blog post, we will cover the different levels of permissions and how they work in Microsoft Dynamics 365 Business Central.
There are five levels of security. At the first level is the license type. This is sort of base layer access that defines what data you have access to at the most. By default, if it’s an Essentials user, it will grant the user full access. This user can create purchase orders and post transactions like journal entries or purchase invoices or sales invoices. If a user has a team member license, then a team member user group is assigned by default. These lite users have read only access to everything at least to start and can modify some existing master data. For more details on the two license types, read this blog post.
Then you have user groups, which is a group of permission sets and within each permission set are certain tables that you have access to. Within that you have the ability to either read, write or modify or delete. You can even restrict access to certain records within a table by creating filters. This is used a lot in the GL accounts, where you have approvers, and they only really need access to the expense accounts. So, you can create a filter that restricts them from seeing any of the balance sheet accounts or sales and revenue accounts and cost accounts.
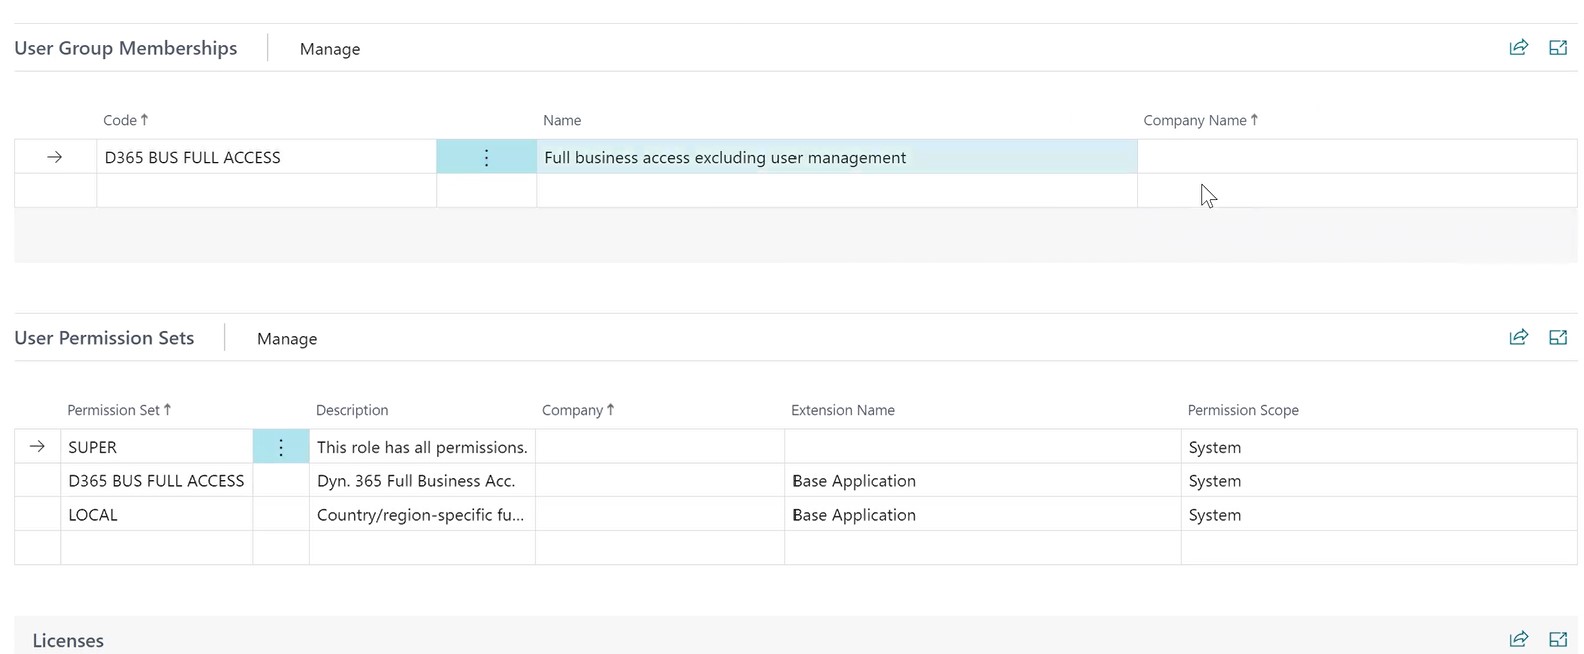
Example: To see how it works, go to User page in Dynamics 365 Business Central. Click on a user. You’ll notice three sections here: Licenses, User Group Memberships and User Permission Sets.
Licenses are the assigned Essentials or Team member licenses. Once you pick the User Group, it will populate the different permission sets that are related to that user group. You can assign a user group to a specific company. To give a user access to all companies and any new companies that you create, leave the Company Name blank. In the screenshot below, you see the user group as D365 BUS FULL ACCESS. It has access to all companies.

To check out a particular User group, go to User Groups in Dynamics 365 Business Central. Here, you’ll see the Default Profile assigned to a user group. If you select a user group and click on Permissions, you’ll notice the different permission sets that are included in the user group. You can also look at the members in permission set for each company by clicking on Members. Basically, User Groups is a way to categorize and efficiently assign multiple permission sets to specific users and give them a default profile.
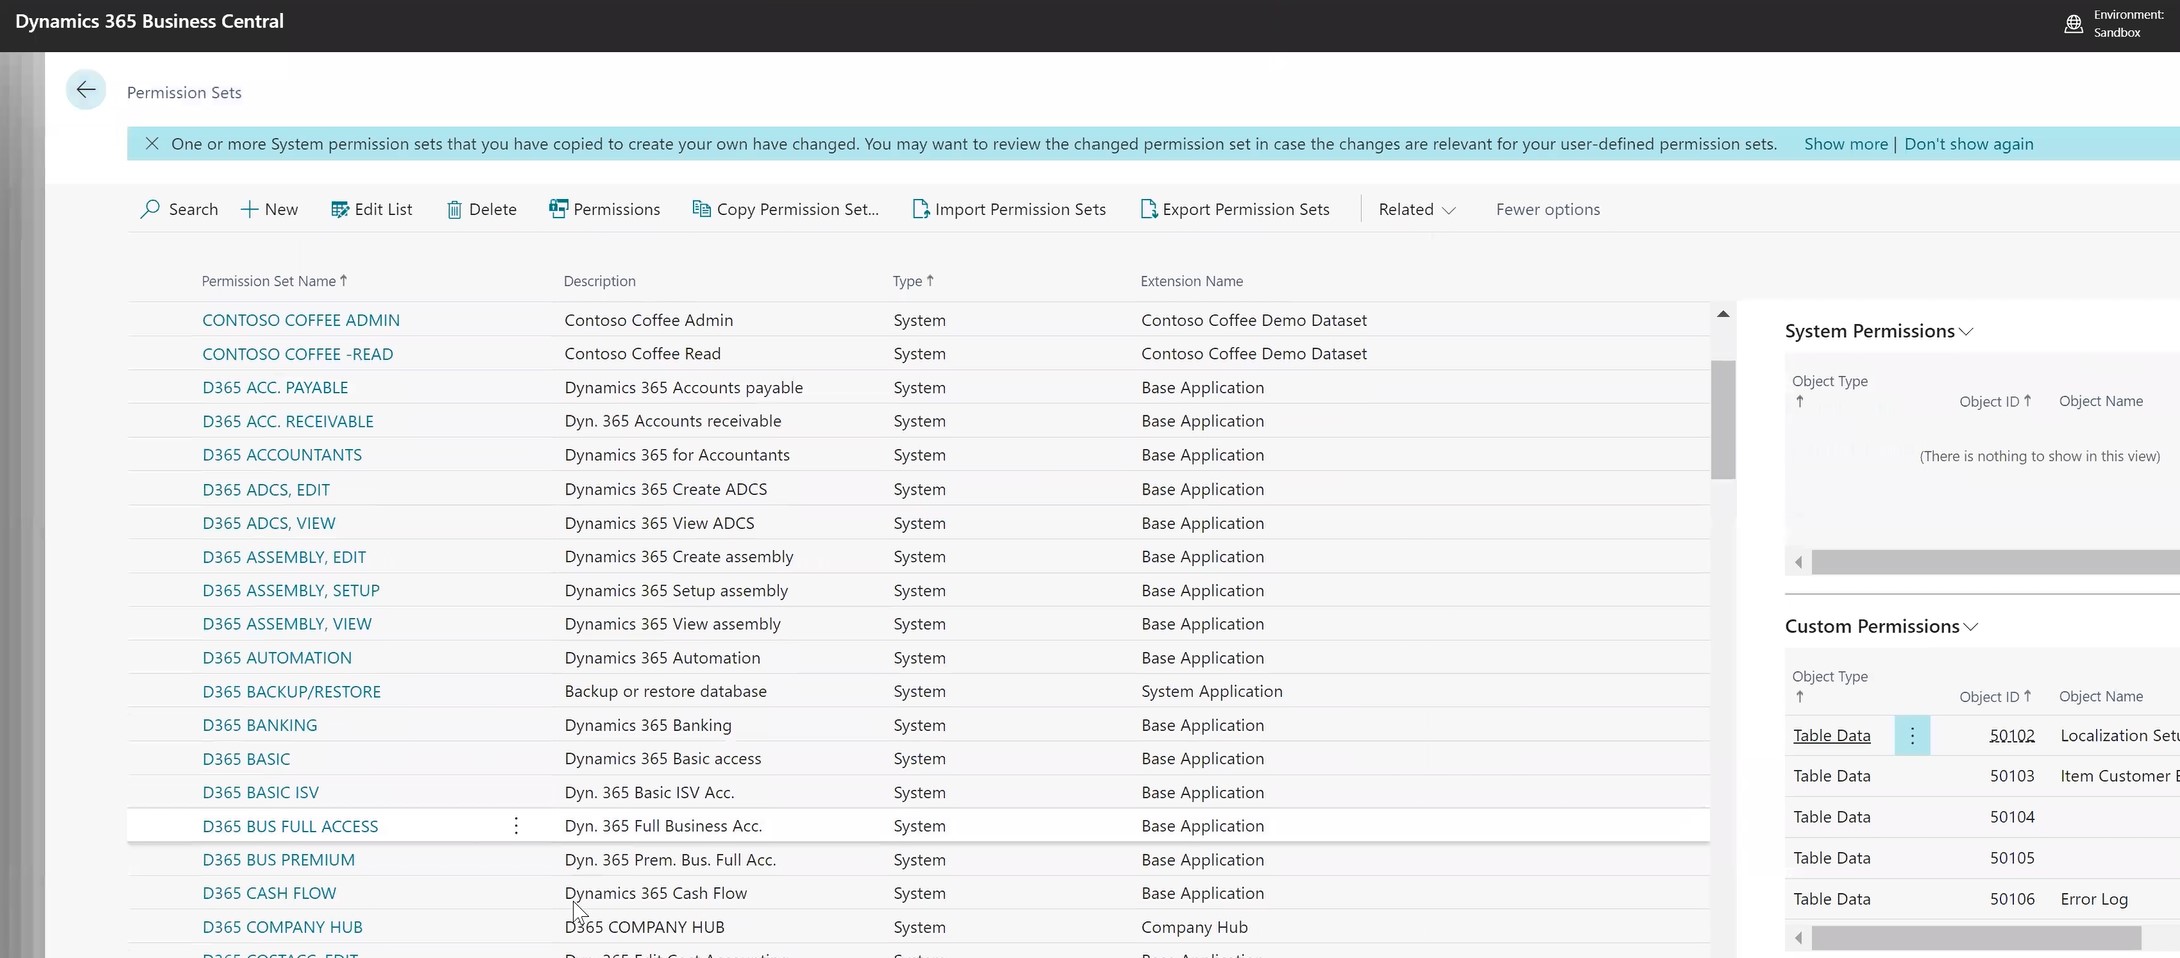
The screenshot below shows some of the Permission Sets that come out of the box. To see what tables are included in a permission set, click on a Permission Set > Permissions. If you’re trying to restrict access, I usually recommend assigning users a permission set in a test company and have them try to do their job – their daily functions, navigate, post whatever they need to do with that restricted permission set and see if one of these permission sets is close enough to what they need.

If you want to make it very detailed, then you can create your own user defined permission set. It is straightforward. The benefit of custom permission set is that you can create it as flexible as you want with the exact access you want. The downside is that it may require some maintenance over time. For example, there are certain tables that everybody needs access to like user type tables, system type tables and those change over time. So, if there is a new release of Dynamics 365 Business Central, you may find that you have to add a table to resolve an error message.
If you click on a permission set, you will see list of the tables that users have access to for this permission set. With Manage, you can add new tables and remove tables. If you want to get very granular with security, you can use the security filter to restrict it to certain records within that table.
You can also Record Permissions. If you’re starting from scratch, you can create a blank permission set and then record. For example- you need to create a sales invoice and post a payment to the sales invoice, you could start recording and navigate to the actual screens to create the sales invoice, post it, create a payment, and post it and then stop recording. In the background, it’s sort of recording a macro and looking at all the tables that are affected and creating a permission set dynamic for you. This is another way to do it if you don’t want to go line by line, table by table creating different permission sets.
To learn more on this topic, contact us today!
– Jason has over 20 years of financial leadership experience in high growth technology companies. He is a Microsoft Certified Dynamics 365 Business Central Functional Consultant Associate. See Credential.